5 Steps to Delete 100% of Your Data From Your Facebook Account
You would think that you could go online and hit a delete button, but it’s just not that easy. Everything you’ve ever done on Facebook is stored for future use. Data and information that you thought was long forgotten is lurking on their servers somewhere.
Of course, it’s straightforward to deactivate your account, but that way nothing gets deleted for you to be able to reactivate your profile as it was.
If you genuinely delete your account, you would have to create an entirely new account if you ever want to return to Facebook. A pathway to true privacy. Editor’s Note: We value our relationship with our readers, and we strive to earn your trust through transparency and integrity. We are in the same ownership group as some of the industry-leading products reviewed on this site: ExpressVPN, Cyberghost, Private Internet Access, and Intego. However, this does not affect our review process, as we adhere to a strict testing methodology.
Step #1 Delete the Linked Apps
One thing people love about using Facebook is how the software connects other applications to enable easy login. What we fail to recognize is that this exposes personal information every time we use it, allowing other apps access to our data.

- Click the arrow located in the top right corner of your page.
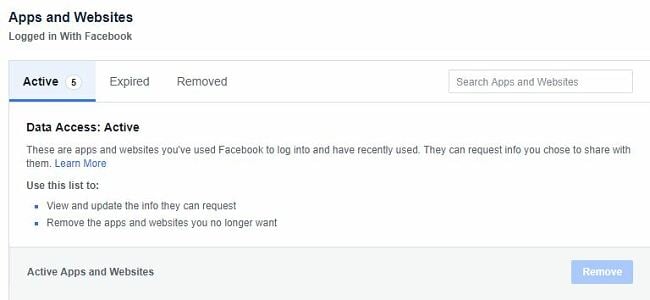
- Select “Settings” and “Apps and Websites,” located on the left-hand side column.
- Scroll down under “Preferences” and “Turn off” Apps, Websites, and Games.
- Once you’ve disabled that, you can then delete any apps currently linked to your Facebook account.
Step #2 Remove Activity History
Your next step is to remove your digital paper-trail.

- Select the down arrow menu.
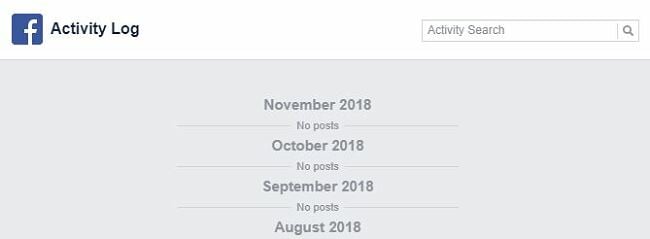
- Select “Activity Log.”
- Use the edit button to delete or unlike every action listed in your activity log.
Step #3 Backup the Data
If you have information on your Facebook account that you want to keep, like photos or contacts, you can back them up manually.

- Head to the Settings menu once again.
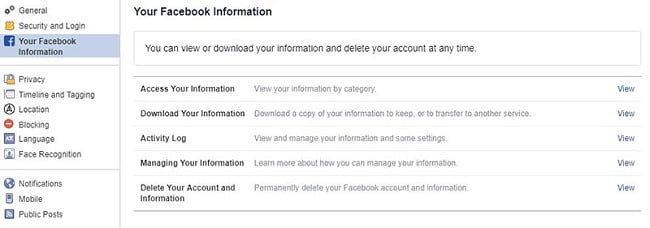
- Under “Your Facebook Information,” and choose the option to “Download Your Information.”
- You’ll receive an e-mail linking you to the download archive.
- Save the archive onto your chosen device.
- This zip file should contain all of your photos, an HTML file containing your friends, etc.
Step #4 Deactivate the Account
A lot of people confuse deactivating an account with deletion, but it’s something entirely different.

Deactivation means that you can log back in after a break and continue where you left off. If you aren’t sure that deleting Facebook is right for you, you can to do this instead.
- Head to Settings once again.
- Select “General.”
- Then, click on “Manage your account.”
- Scroll down until you see the option to deactivate.
Step #5 Delete Your Account
It’s become more accessible to delete your Facebook account than ever before, which is a major positive.

All you need to do is go to “Your Facebook Information,” click “View” next to “Delete Your Account and Information.”
You’ll notice that there are some other options in here that we’ve already covered. Once you enter your password, your account will be deleted. Freedom at last!
The Catch
Facebook is generous enough to hold onto your information for 14 days in case you change your mind.
What’s Going on with Facebook?
With more than two billion users, Facebook continues to be at the forefront of privacy scandals. Even back in 2006, when they first introduced the news feed, they were violating user privacy. Now, most people don’t care that their private lives are blasted on all their contacts’ feeds.

Then, in 2013, Facebook fell victim to a virus which exposed the phone numbers and addresses of six million users. All that was required for someone to access your account was a connection to you and another piece of contact information.
In February 2018, when the Belgian court ordered Facebook to cease tracking people online, the company appealed the decision. Then, just a month later, users discovered that Facebook was aware of massive data theft that was occurring, and did nothing to prevent it. The only compensation was an apology and a promise to do better.
After all of this, do you trust the company to keep your information private? The question is if you prioritize updating your online profile or maintaining a good level of privacy and security.
How should you go about liberating yourself permanently from Facebook?
It Goes Beyond the Delete Button
If you do feel the need to go back, we suggest returning after the 14 days to ensure all previous data is deleted, and you can be more selective with what you share in future.


Leave a Comment
Cancel